Friday, 30 September 2011

coming soon

It's been a while since I have updated this blog but winters here, my funds have nearly dried up. so it's time to update this blog over the next few weeks i have paint, mechanical assembly, interior refit and engine ancillery rebuild to cover.  Specific item are alternator upgrade, Electronic fuel injection and modifiying a dizzy for engine management.


The first of these updates are planned soon so for now watch this space.

looking forward to the future the car should be back on the blacktop early spring if the engines ok.

Nigel

Friday, 8 April 2011

Fibre glass

I would normally spend ages getting rid of the horible stuff but in this case i will be adding some.  The picture below is the Mercedes C Class interior i bought on ebay. wilst the from seats are easy to fit the rear seat is a little bit more envolved. I have made a fibreglass seat base to support the seat foam. The build details are below.  I have now started to make a headliner shell so that i can use modern headlining material.


The seat foam was covered in 2 layers of masking tape as cured fibreglass seems not to stick to it. The resin was mixed with catalyst and spread over the matting. Very messy but i got a very good result. the headliner was made from hardboard that was wetted and clamped in place. Over 3 days the hardboard flexed to the correct shape, i have let it dry out and have used this to apply the masking tape to. Fibreglassing the seat was messy, haveing to apply the stuff to the underside of the room is just bloody awfull. For now i will do limited areas untill i have at leat 1 layer all over. I will extract the liner and complete a second layer on the bench.

Saturday, 16 October 2010

Little progress lots of prep

Well the spitfire is now in winter storage so the beemers back in the garage, and not a moment to soon as the cover was beginning to leak.

I have started the task of getting rid of the rust on the bonnet doors and front wings. And with the bonnet being the worst i started with that.

The condition under the layers of filler,lead loading and fibreglass was rubbish so much that i should have thrown the bonnet away and found a better example. Still might have to but first i am going to try and repair it.

The front lip is shot apart from 6" or so that has already been replaced. I have now replaced most of the front lip and whilst not perfect i surprised myself at the outcome, hopefully the lightest skim of filler will completely cover the repair.

The inner reinforcement was also shot this has been partially sorted. Once this has been refitted to the bonnet i will take out the supports for the bonnet stay and redo them.


Tuesday, 24 August 2010

BMW Paint - more progress wow

As you can see from the pictures below the boot has been painted along with the fuel tank. Also the the underside of the car is now finished. The rear subframe and diff have been bolted in for the final time. The engine bay has been primered and rubbed down.

Boot area looks good

Underside the cleanest it's been in 30 years won't last long once the cars finished.


With this years quota of paint done the mechanical work can start.

Also got the engine bay and front inner wings painted.


Also got a Ti manifold off ebay, thanks Gus. Now i have nearly all the manifolds for a M10 engine i have decided to go with the TI manifold and throttle body. Just looks right for the car. The later 318 manifold i have i think would yeild more BHP but would look wrong. I have also just bought an E30 injection pump to supply the fuel. Might work watch this space.

Let the mechanical refit begin - This will progress slowly untill the Triumph spitfire gets mothballed in it's seaside retreat and the Beemer takes centre stage in the garage. That dates 5 weeks away.

Monday, 16 August 2010

BMW Paint

Small parts in primer


Hanging garage of car parts !
Pedal box after paint and reassembly
Shiny diff ready to be refitted.
More paint needed.
Rear area painted.
Engine bay in first coat of primer now flatted to reveal all manner of inperfections that need to be resolved before colour coat. Also repainted front subframe, Tiebar is knackered and will be replaced later.
Dash area painted.

Sunday, 1 August 2010

BMW 2002 Paint At last !

Finally, the weldings done. Well almost a few last bits to tidy up but nothing that stops paint going on the car.

The interior is now sprayed, not the best job but more than adequate for something that will never get seen. Over the next month the underside boot and engine bay will be sprayed along with all the black bits, suspension parts sub frames and brackets will be completed.

That should leave me in good shape for all the mechanical work during the winter.

The paint system i have used is a newer waterbased system. this has caused some issues along with the usual suspects.

The issues i have are -

1. Contamination in the paint - Spraying in a dusty garage is never good i have a plan to counter this when i get to the outer panels.

2. Water getting on the paint ( yes i know i'm using waterbased paint ) but the effect is to ruin the colour coat - This i think is coming from the compressor, an air filtration system is on it's way.

3. The metallic base coat i am using takes a better spray technique than i currently have. More practice required. Also the drying time is far greater than i am used to to combat this more light coats of paint and a bunch of infrared heaters are required.

Update -

Well the paints finally going on the interior is done as is most of the parts that need to be painted black including the front and rear subframes. Pictures to follow this evening if the rain stays away.

I am now on track to complete all the paint that needs to be done so that i can reassemble the car mechanically over winter and get the engine running on megasquirt.

Finally a deadline that i have a chance of meeting


Thursday, 15 July 2010

Noisy complaint - Little progress

Well yet again the welding is not complete however the list has shrunk from the last post. The jobs left to do are.

Finish both rear wheel wells - most work done needs tidying.
Boot bumper support brackets reinstalling.
Small hole in drivers floor under rear seat support.
Finish weld drivers floor repair.

The reason i am now so late is a neighbours that reported me for noise instead of walking down the drive and telling me to be a bit quieter !


They asked for me to spot at 6pm as they have children that need to go to bed. I don't have a problem with this but all the kids in the street play out until about 8 ish this time of year.


secondly they " think" it would be better for me to make noise early on a Saturday morning when people are trying to sleep instead of working on a Friday afternoon when most people are at work !


I challenged the last point and they came back with we dont want to hear noise when we get home from work.


Any way i made some concessions about the 6PM and since that the noise abatement officer at the council can't get hold of the complainer. Quote I can't stop you doing your hobby so until i get another complaint carry on i won't be taking any action against you. Also i have made reasonable attempts to call the complainer, If they don't reply to my call that not my fault.


So it seems that the complainer wasn't up to the fight which in my books means that either it wasn't that important to them. Or they have heard me talking to my neighbours and are now feeling sheepish for not talking to me directly.


Another theory is that i live on a private drive, the kids in the close tend to play in this area as it is safer for them to do so, and they are welcomed to. However a dismantled car is a danger to them and they now no longer play in this area. Now the kids are not quiet and they must be making noise right outside there own door and this i think is the real problem.


Anyway the plan now consists of getting the welding finished, weather permitting this should take a couple of weeks.


I will then paint the boot, underside, interior, engine bay and inner wing areas. This will at least enable me to do most of the mechanical work this winter.


The boot lid, doors, bonnet and exterior paint can then be painted next year when the temperature permits.


Other stuff, the engine is now back in one piece as i now belive that the cylinder head might be ok and the problem was the gasket. I have also painted the engine and some ancilleries. This winter i will put the engine back in the car and sort out all the new injection parts that need to be installed. and then hopefully the car will then run.


I have gained an ansa exhaust from a bmw 3 series that will need to be tweaked to fit. This winter i also want to make an exhaust manifold and upgrade the centre section of the exhaust pipe. Difficult but might be worth the effort.

Tuesday, 4 May 2010

Rust, welding and paint

Another late update, just gave up documenting the amount of rust in this car.

The list is.

New boot floor

Rear panel under bumper

Rear lower side panels

Rear shock towers

OS Rear suspension support, and stiffeners

OS Outer sill + patch repair inner sill

NS Rear suspension support (TBC)

Inner wheel arch OS and NS (TBC)

Rear window surround

Front window surround (TBC)

Driver floor needs seam welding from below

A post repairs (extensive) OS and NS

Rear of front panel both sides

Front chassis support member

Front panel below bumper - minor welding (TBC)

Scuttle panel welding.

Strengthening chassis supports

NS lower wing repair

Bonnet repairs to correct mistakes

Small repairs to door (TBC)

The good news is that the welding is 90% complete and most of the rust has been banished. The exception is the door and bonnet. That will come soon. The BMW has now been put back on the drive to make way for the return of my spitfire that needs the garage space. The collection of the photos below shows some of the repairs.

Rear end, 95% of the rust is gone and bear metal etch prime red or rust neutralizing paint applied.


Chassis strenghtener


The Nose ! Front panel is good but bonnet lip needs work


Front side panel


Looks awful, two more sessions and this was completely clean.


Front chassis reinforcement and what what i has as a pattern for the new part.


Sill end / subframe mount / seat belt point repairs.


And what i started with.


Front end looking more healthy.

Front chassis reinforcement in place and painted. The bottom panel for the radiator mount also welded, battery mount needs to be derusted and welded back in.


Wednesday, 16 December 2009

BMW 2002 Slow progress


It's been a while since i posted my last instalment, In this time i have had to replace my MIG welder with a new unit and swop to bottled gas instead of the thow away bottles from machine mart. The cost of which has slowed me up a little.

The good news is the both inner wing repairs are now complete, the drivers floor is finished for now. It will need seam welding and the engine chassis rail leg repaiing when i roll the car onto its side later this year. And last of all the rear window opening is about 50% complete as well. The pictures are below.

I have found more rust in the rear subframe mounts and the front panel. Nothing that cant be corrected. Hopefully most of the small repairs plus finishing the windscreen surround will be completed this week and some more next week.

I have started the intake system for the engine by buying a BMW 5 series intake manifold. On the ebay picture the bolt pattern for the cylinder head looked similar. I turned out it my be a little to far out for me to use the whole system. Also the ports on the 02 are a lot larger than the 5 series whick would leave some wall section to thin. More thought needed in this area before i make my next move.

Also the alternator is going cause me problems as it sits close to inlet runner number 4


Thursday, 10 December 2009

Bmw 2002 boot repair part 3

Ive got all the panels i think i need to repair the shell, namely the rear wheel arch parts and drivers floor. To start with the near side rear wheel arch.


These are the parts involved, the grey wheel arch outer and the black inner reinforcement. The inner panel is genuine BMW and looks very well made.


Unfortunately the wheel arch isn't the panel is made of two parts spot welded together. It also has many ripples in the panel. The seams will need seam welding and the ripples gently smoothed out. The yellow line is probably what i am going to cut off the repair panel.


The hole is open and the panel was plated over pity whoever did that didn't remove the rust before they hid it. so good job the panel is out as it would have been dangerous.


Bump stop mount to cut off clean and weld back on. I might tweak it to allow for full suspension travel when the car is lowered. Further investigation shows this one buggered and the other side stop is crushed. These parts are not available so i will have to make them from new.


The shock mount need also to be cut off cleaned and refitted.


This underside view shows the two new panels and a repair panel that sits behind the rear seat. It's all held together with self tapping screws.


This shot show the upper side. The welding sequence is remove the three panels still screwed together and weld the two wheel arch panels. Then remove the reinforcement panel and drill a spotweld hole every inch along the edge. the holes are plug welded and ground flat. Last of all all the edges will be seam welded on the inside and the outside of the panel so that i know the panel is strong and lock out moisture that will get into the panel gap and cause more rust.


All that left is to do the whole thing again on the other side. This repair has taken about 20 hours to complete.

Sunday, 6 December 2009

BMW 2002 floor repairs

The boot repair is progressing but as yet i can't get the new panel to fit as well as i like. I will eventually get it in, but in the mean time i have been stripping the car, The sunroof is out of the car the picture below shows a surprise. I have also removed all glass, doors and dashboard. This has thrown up some more rust. mainly in the window openings and front bulkhead area. The boot lid and front wings will come off soon.


A sprinkling of rust flakes from the underside of the roof, i have never seen rust on a car here. WOW a new place for rust to lurk!

The water getting into the car is from bad welding repairs and via the fan unit, as i removed one of the fan ducts i got cover in about half a litre of water. both area fixable i think. I have started the floor repair, i cut a bad patch of plating out the passenger rear floor the floor wasn't that bad so why the big patch i don't know. What i do know is that water was helping the whole thing to rust out again. The picture sequence below shown the repair to the floor.


The floor repair in this area is now complete, not completely invisible but better than the previous attempt. Once the Stonechip is on the underside you will have to look hard to find the repair. Job done next repair.

Wednesday, 25 November 2009

Boot repair part 2


The boot repairs are progressing slowly, the pictures below show the new panels have been formed. There is still a long way to go to finish this repair, lots of dressing flanges and welding. The boot area will need to be stripped of all paint and grot before the new panel is welded in place for good. Then just some small repair patches to finish this bit of the boot repair.

Now the rest of the news-

I have removed most of the sound deadening pads inside the car and it seems the rust isn't actually that bad. The only bit that might need work is the drivers front floor pan. It might turn out to be better to replace with a repair section. The car is now in the garage as the spitfire is over wintering in sunny Weymouth. When the footwell finally dry out i will run a wire wheel over the floor to remove some of the crud.

I have also managed to get the engine running, not easy seeing as the car had two types of spark plugs ( two of which were faulty), HT leads that were knackered and a distributor that was incorrectly set in the engine block, The coil was also knackered the rotor arm had also been tweaked. A new set of leads, plugs, coil from the spit and cleaned point had the car running. Albeit badly, there is an air leak in the the inlet system oh and clouds of blue smoke from the exhaust ! Bugger that put the idea of getting the car back on the road next summer. Plan B i think.

The air leak i think comes from the rubber hoses to the brake servos, havn't checked this yet but might be the reason the servos don't work . The blue smoke comes from either or both the valve stem seals and work piston rings. Both of which require major work on the engine.

So the new plan is to go straight into a full on resto and engine build. The major repairs to the body will be completed first the new injection system will probably be next. This is only because i dont want to do the initial tune to the injection system with a rebuilt engine. I at the very least will need the fuel and spark maps to run the engine with no load up to 2000RPM. This is because i need this to break in the new engine after the rebuild.

Friday, 13 November 2009

bmw 2002 boot repair part 1


I have started work on the worst area of the car, that is the boot. I decided to run a wire wheel over the boot area. The results found a huge amount of seam sealer and newspaper filler. In the process finding that the boot is from another car and has large gaps filled with seam sealer. So it was no surprised that boot came out fairly quickly. The pictures below show that the outer panels are largely rust free and can be reused.


The picture below show the start of repair panel for this area, the spare wheel well is in the process of being cleaned so that it can be welded into the new panel.


Once this side is welded in place i will repair the other side. Then i can start on the other areas like the wheel well to boot floor repair panel and both lower quarters to the rear panel. the latter have been welded badly and will need to to redone. The next repairs will be the upper boot floor panel, which should be straight forward. Then onto the pig of a job which is the wheel well itself. In the process if doing these repairs i noticed that the rear parcel shelf is rusted out and the outside panel is in the same state. Another pig of a job to do right. I will however cut and flange 6x9 speaker holes in the parcel shelf when the window is out so i have some where to fit speakers without cutting trim panels about.

The repairs should speed up when the spitfire is safely in it's temporary home in Weymouth, at the moment dragging a dead car in and out of the garage is a pain. This will happen next weekend. Also some of the car bits will be put up in the garage loft, i have started this but need to finish. I have some new waterbased underbody stonechip to try out as well, busy then.

The waterleaks that fill up the footwells is not the fault of the sunroof, the water is dripping down the bulkhead from behind the dashboard. at some point i will remove it to find out if it's the windscreen or another spot.


Friday, 30 October 2009

bmw 2002 - Whats wrong, Whats right ?

I collected the car today, on the face of it the cars not to bad. However that is based on the condition of the spitfire when it landed on my drive.

The car has been partially stripped.There seems to be over two cars worth of bits sorting them out will be a challenge. The good news is that i think everything is in the boxes apart fron one front indicator assembly. So overall not to bad.

The car itself has a few issues as most of these cars do.

  • Various bubbles of rust on various panels.
  • The Bootlid and bonnet panel gaps are not very good, hopfully when i re-install the catches and adjust them everything will be Ok.
  • The door gap however are very bad but i managed to twist the passenger door to fit the opening. i suspect the door has been reskinned and the not welded in a few points to lock the door in the correct shape. This hopefully is an easy fix.
  • The engine bay is clean apart fron rust bubbles on the strut tower tops.
  • Front wings are very good.
  • Sills look good but will need more investigation to confirm.
  • Roof panel and rain channels look good.
  • Rear quarters are good but i suspect the wheel arch lips have been replaced.
  • Rear light panel is good as are the front and rear valances.
  • Now the bad part the boot and floor panels. The front floor panels have been patched badly and are rusty and full of water. These might be salvagable with some better welding otherwise i will by replacement panels. The boot Oh my God the welding looks like it been done by a blind man in a rush. So the plan is to buy repair panel from Jaymic with new suspension reinforcement panels and weld into place. Easy to say but a bitch to do properly in the confined space. The boot area is also very rusty. I will have to give it a good clean to find the full story, hopefully small patches rather than a new boot floor is all it will need.
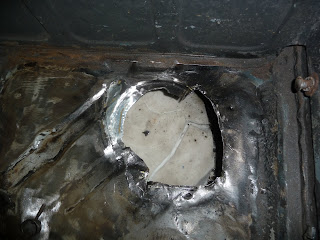
  • The good news is that the car is repairable, it could have been a lot worse.
  • I will have to go over the car and soort out most rust spots so that i can halt the rust going and further SOON!
  • The interior is a mixed bag the back seat cover is in good nick, i will just have to replace the old padding underneath so not a problem, the front seat will need more attention. It might also be trimmed in leather.
  • The carpet is shot, waterlogged and yellow - Bin order charcoal or black replacement.
  • Front door cards are in bad shape rear card are spot on, just needs a clean.
  • The dash and centre console is good clean.
  • The pedal work, the accelorator need sorting, might opt for a roller rather than the standard setup- worked well on my VW 20 years ago.
  • I couldn't start the engine it's either fuel or spark and maybe compression. The wiring loom is part Tii which is not helping, i'll wire a new circuit and add an electric fuel pump to get her running.
  • Also i will have to do the mechanical inspection and asses what needs doing.
Overall an Ok car, not that easy to sort but not to bad, certainly i have until April next year to sort it for the MOT and hopefully next summer i'll get all the mods done in readiness for the teardown and restoration next winter.

The plan for now is

  • Stop the rust going any further.
  • Get the engine started.
  • Reinstall some parts to get the panel gaps correct.
  • clean it.
  • Start the injection system build.


Monday, 14 September 2009

Spitfire 1500 project end BMW2002 start.


Someone once said with every end there is a new beginning.

Well after 2 years with the spitfire it's finally time to focus on something else. The spitfire will stay and be used in the summer months. However there will be no more development apart from screwing bits back on when they fall off.

So what next - Well this story starts back in the early eighties. As a very young lad i saw a BMW2002 in pale yellow, no considering i was used to the family VW Beetle the BM was very futuristic. That image has stuck with me all these years, and thanks to Retro car magazine and picture of a 70's race car i just had to get one.

That decision was over six months age, tomorrow i will go and collect 02. The picture below is definitely the start.


Now the plan

Theme Race car for the road.

  • Lower front by 3 inches and re-engineer the front suspension.
  • Lower the back by 2 inches and modify the rear subframe.
  • Restore the car, paint colour is TBA. i have a few ideas.
  • Big brakes E21 rears turbo brakes front, with race/road pads.
  • Engine, Aftermarket ignition, CBR600 throttle bodies, M40 injection rail, high compression pistons, Schrick 292 cam, hand made tuned intake system, Turbo manifold and exhaust. In short i want 160BHP.
  • Interior, might be rolled caged.
  • 5 Speed gearbox, (Easier that the spitfire 5 speed conversion).
  • Electronic gauges in old pods with old dial faces.
  • Body - turbo wheel arches. might have turbo front spoiler or something else. havn;t decided yet.
  • Strut braces.
  • Bling.

First jobs to do

  • Assess how much rust this has and what welding needs re-doing.
  • Make a parts list of anything needed to get to MOT standard.
  • Get it back on the road.
The plan is get it back on the road. Then mod the engine for fuel injection and suspension, exhaust, strut braces ect. When i am happy i will strip the car to the last nut and bolt and restore the car to rude health. Last of all strip the engine and rebuild it from the bottom up with the tuneup goodies. Thats easy to say but i suspect that this is 2 years of work.


Monday, 27 April 2009

Spitfire brake - here i go again

Well

The wethers improving the new ignition is sorted, but now sports a new dizzy. I bought a spring pack from moss which turned out to be a perfect waste of money cause it didn't work. The new dizzy does. Wonderfull the engine now revs to 5k RPm and sounds like a sewing machine when it does. Job sorted.

I have also fixed the manifold leaks. it was the throotle shafts in the carbs ! doh. I was going to fit oversize throttle shaft but moss could not produce the good on time so i sleeved the shafts reamed the holes to 8mm. I also fitted plain throttle disks. job done some tweaking is required for the choke operation but that can wait for later.

My air fuel meter has changed, I altered the electronic circuit so that i can focus on the just lean to just rich range. Show that the engine is a little rich at idle. If reduced to be acceptable there is hesitation under 2k RPm. i think that some playing with needle might be in order soon.

Other than this i have put a few miles on the car even doing the 80 mile round trip to work down the M4 without any issues. Just a few suprised drivers to see they are being overtaken by what is now a relic.

I spotted some vitess parts on Ebay so i am shortly to be the owner of some uprights and caliper brackets. now i could go the easy route and fit the rest of the Vitess parts but um no. That would be far to practical and easy. So my plan will take one of the following routes.

  • Fit Capri 2.8 disks, I think the OD will need machining. And Austin princess calipers that i will have to space out.
  • Make new caliper brakets and fit metro calipers, i have been loaned a caliper for fitting purposes./
  • I believe that i cheaper alternative is to use landrover disco calipers but have some more rechearch to do.

Further to this i have now tried some MG metro calipers that bolt straight up to the Vitesss caliper brackets, unfortunately i would have to use the spitfire brake disks. The standard vitess type 16 calipers not only have a larger friction area on the pads but run with bigger brake disks. so the standard setup will be used, the only question is do i use vented disks ? that decision can wait untill i have bought some calipers.


Sunday, 22 March 2009

Spitfire bits and bobs

Well the ignition system lasted all of 200 miles before it failed. however the problem was easily tracked down the case was live with 12vdc when this shorted out it cut the ignition out. The fix is in progress and will be refitted to the car soon.


Other stuff that has been done is chase down the leak in the inlet manifold and seal the exhaust. Whist i had the manifold off the car i fitted non waxstat jets to the carburetters. This was not entirely easy as i had to modify the linkages slightly. All went together easily but i still have a high idle speed, looks like throttle spindles are next on the list.


As well as this i used the opportunity to fit the 02 sensor to the exhaust manifold, the gauge now works and without to much fiddling i now now that at idle the car puts out %3.0 Co and is slightly lean on full throttle. I will leave well alone until after the cars MOT and then tweak some more.


The last news is that i bought engine and radiator valances off an Ebay seller, it was spur of the moment but at least it one job i can now finish. The radiator valances i have made will be put on ebay once finished.

Monday, 16 March 2009

Spitfire Electronic ignition part 5

The ignition unit is now finished and working. I'll have to use the car a bit to see if it;s reliable. The finished picture is shown below. I will add a picture in the car soon.


There were a few teething troubles which were caused by my lack of ability more than anything else. I fried a total of 3 transistors, 1 diode and 3 resistors. Oh and gave myself a 300v shock bonus !

The other thing i noticed was a poor spark on the conventional points system. One new 12 volt Bosch blue coil helped no end. Should have done that sooner. what an improvement !

I still have a few tests to run, like shorting out part of the PCB circuit and seeing if the 300V rail drops when the spark output is at 1000 sparks per second. Now a thousand sparks a second is something to see and hear i'll try and post a clip at some point.

Another job is to reset the ignition timing as it probably a little out, a job for tomorrow.

However my main concern is reliability, to this end i'll keep the old coil and ignition module in the car for a while.

Driving
Oh my god new coil + new Ignition module what an improvement. Better idle, less choke. revs quicker when you blip the throttle and no hesitation either. BHP / Torque has also been improved especially from 3000 RPM onwards. I used to struggle to get to 70MPH but now it get there easily. It make the spitfire an altogether better experience. If it lasts i think i'll call this one job done.

Or will i there is a option to increase the output from 45mJ of energy per spark to 110mJ per spark. Now i probably don't need it but curiosity might get the better of me. I would have to rewind the transformer add another zenner diode and 1uf capacitor. that would give me 375volts and double the stored energy. all this equals bigger spark.